Illuminating Innovation: How to Make Daylight Sensors in Minecraft
Minecraft, the sandbox game that fuels creativity and problem-solving, offers a plethora of items and mechanisms to enhance your gameplay. Among these, the daylight sensor stands out as a particularly useful tool for automating tasks and creating intelligent systems. This article will provide a comprehensive guide on how to make daylight sensors in Minecraft, exploring its functionality, crafting process, and practical applications. Understanding how to make daylight sensors in Minecraft is key to unlocking advanced automation possibilities within the game.
Understanding the Daylight Sensor
Before diving into the crafting process, it’s crucial to understand what a daylight sensor is and what it does. In Minecraft, a daylight sensor, also known as a light sensor, is a block that emits a redstone signal based on the current light level. This signal can be used to activate or deactivate other redstone components, allowing you to create systems that respond to the time of day.
The daylight sensor’s output ranges from 0 to 15, with 0 representing complete darkness and 15 representing full daylight. This granular control allows for precise automation based on specific light levels. This is essential to how to make daylight sensors in Minecraft useful.
Gathering the Necessary Materials
To craft a daylight sensor, you will need the following materials:
- Glass: Three glass blocks are required. Glass is made by smelting sand in a furnace. Sand is commonly found near bodies of water.
- Nether Quartz: One nether quartz is needed. Nether quartz can be found in the Nether dimension, typically in veins along the walls and ceilings of caves.
- Wood Slabs: Three wood slabs of the same type are required. Wood slabs can be crafted by placing three wood planks in a row on a crafting table. Any type of wood will work.
Acquiring these materials is the first step in understanding how to make daylight sensors in Minecraft.
Crafting the Daylight Sensor
Once you have all the necessary materials, follow these steps to craft a daylight sensor:
- Open your crafting table: Interact with a crafting table to open its crafting interface.
- Arrange the materials: Place the materials in the following pattern:
- Top Row: Place three glass blocks in the top row.
- Middle Row: Place one nether quartz in the center slot of the middle row.
- Bottom Row: Place three wood slabs in the bottom row.
- Craft the daylight sensor: If the materials are arranged correctly, a daylight sensor icon will appear in the output slot. Click on the icon to craft the daylight sensor.
- Move the daylight sensor to your inventory: Drag the daylight sensor from the output slot to your inventory.
Congratulations! You have successfully crafted a daylight sensor. Understanding this process is core to how to make daylight sensors in Minecraft and effectively using them.
Using the Daylight Sensor
Now that you have a daylight sensor, let’s explore how to use it. The primary function of the daylight sensor is to emit a redstone signal based on the ambient light level. This signal can be used to power or de-power other redstone components.
Basic Functionality
Place the daylight sensor in the world. During the day, it will emit a redstone signal. The strength of the signal will vary depending on the amount of sunlight. At night, the sensor will not emit a signal unless it is inverted (more on that later).
Connect the daylight sensor to a redstone wire or directly to a redstone-powered device, such as a piston or a lamp. When the daylight sensor detects sunlight, it will activate the connected device. This simple setup is the foundation of how to make daylight sensors in Minecraft useful for basic automation.
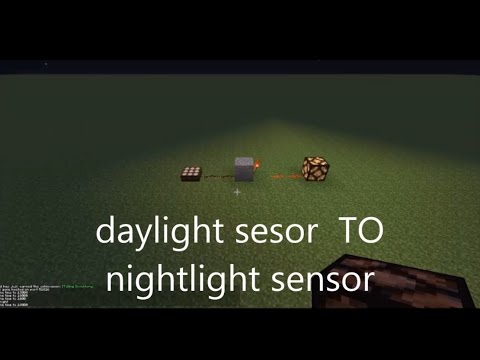
Inverted Mode
Daylight sensors can also be used in inverted mode. In this mode, the sensor emits a signal during the night and no signal during the day. To activate inverted mode, right-click on the daylight sensor. The sensor will change its appearance, becoming darker. Right-clicking again will revert it to normal mode.
Inverted mode is useful for creating systems that activate at night, such as automatic monster traps or nighttime lighting systems. Knowing how to use inverted mode expands the possibilities of how to make daylight sensors in Minecraft.
Advanced Applications of Daylight Sensors
Daylight sensors can be used in a variety of advanced applications, including:
- Automatic Lighting Systems: Use daylight sensors to automatically turn on lights at night and turn them off during the day. This is a simple yet effective way to conserve resources and automate your base.
- Automatic Doors: Create doors that open during the day and close at night. This can be used to protect your base from hostile mobs.
- Crop Irrigation: Use daylight sensors to control irrigation systems for your crops. This can help optimize crop growth and conserve water.
- Mob Traps: Design mob traps that activate at night when hostile mobs are more likely to spawn.
- Redstone Clocks: Create complex redstone clocks that change their behavior based on the time of day.
- Solar Panels: In modded Minecraft, daylight sensors can be used as components in solar panels to generate energy.
Exploring these advanced applications is vital to mastering how to make daylight sensors in Minecraft truly impactful.
Tips and Tricks for Using Daylight Sensors
Here are some tips and tricks to help you get the most out of your daylight sensors:
- Placement Matters: The placement of your daylight sensor can affect its accuracy. Avoid placing it in areas that are shaded by trees or buildings.
- Signal Strength: Use redstone repeaters to extend the range of the redstone signal emitted by the daylight sensor.
- Combine with Comparators: Use redstone comparators to create more complex logic circuits that respond to specific light levels.
- Experiment: Don’t be afraid to experiment with different configurations and applications. The possibilities are endless!
Troubleshooting Common Issues
Sometimes, you may encounter issues when using daylight sensors. Here are some common problems and their solutions:
- Sensor Not Working: Ensure that the sensor is not obstructed by any blocks and that it is properly connected to a redstone circuit.
- Inconsistent Signal: Check for sources of light that may be interfering with the sensor, such as torches or glowstone.
- Inverted Mode Issues: Double-check that the sensor is in the correct mode (normal or inverted) for your desired application.
The Future of Daylight Sensors in Minecraft
As Minecraft continues to evolve, the role of daylight sensors is likely to expand. Future updates may introduce new features and functionalities that further enhance their utility. Staying informed about the latest developments will help you stay ahead of the curve and continue to innovate with daylight sensors.
Conclusion
Daylight sensors are a powerful tool for automating tasks and creating intelligent systems in Minecraft. By understanding how to make daylight sensors in Minecraft, gathering the necessary materials, and mastering their functionality, you can unlock a world of possibilities. Whether you’re building automatic lighting systems, crop irrigation, or complex redstone clocks, daylight sensors are an essential component for any aspiring Minecraft engineer. Experiment, innovate, and continue to explore the endless potential of daylight sensors in your Minecraft world. Remember to always consider the best placement for your sensor and how to optimize its signal strength for your specific needs. With a little creativity and ingenuity, you can harness the power of the sun (or lack thereof) to automate and enhance your Minecraft experience. Now that you know how to make daylight sensors in Minecraft, go forth and illuminate your creations!
Remember to always stay updated with the latest Minecraft updates to discover new ways on how to make daylight sensors in Minecraft even more effective. [See also: Advanced Redstone Circuits in Minecraft] [See also: Automating Your Minecraft Farm]
